Mazda CX-5 Service & Repair Manual: Engine Coolant Temperature (ECT) Sensor Inspection
Resistance Inspection
WARNING:
-
When the engine is hot, it can badly burn. Turn off the engine and wait until it is cool before removing the ECT sensor.
ECT Sensor No.1
1. Remove the ECT sensor No.1..
2. Place the ECT sensor No.1 in water with a thermometer, and heat the water gradually.
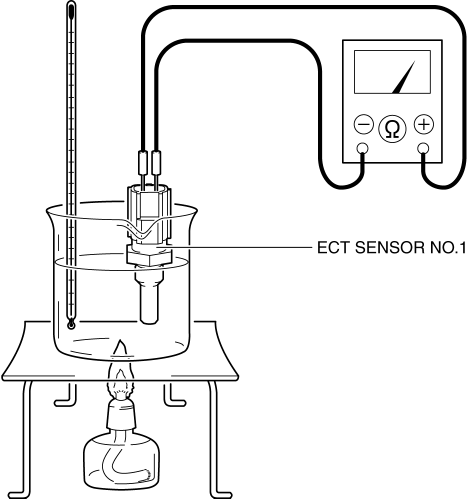
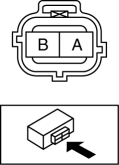
3. Measure the resistance between ECT sensor No.1 terminals A and B.
-
If not as specified, replace the ECT sensor No.1..
|
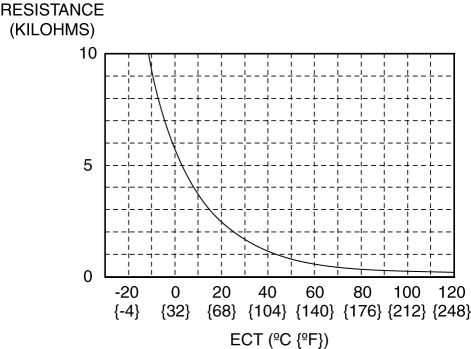
ECT (°C {°F}) |
Resistance (Kilohms) |
|
20 {68} |
Approx. 2.45 |
|
80 {176} |
Approx. 0.318 |
ECT Sensor No.2
1. Remove the ECT sensor No.2..
2. Place the ECT sensor No.2 in water with a thermometer, and heat the water gradually.
3. Measure the resistance between ECT sensor No.2 terminals A and B.
-
If not as specified, replace the ECT sensor No.2..
|
ECT (°C {°F}) |
Resistance (Kilohms) |
|
20 {68} |
Approx. 2.45 |
|
80 {176} |
Approx. 0.318 |
 Crankshaft Position (CKP) Sensor
Purpose/Function
Detects the crankshaft speed as basic information for mainly determining
the fuel injection timing and ignition timing.
Detects the crankshaft speed and inputs it to ...
 Engine Coolant Temperature (ECT) Sensor Removal/Installation
WARNING:
When the engine is hot, it can badly burn. Turn off the engine and wait until
it is cool before removing the ECT sensor.
ECT Sensor No.1
1. Disconnect the negative battery c ...
Other materials:
Theft Deterrent Horn Inspection
1. Disconnect the negative battery cable..
2. Remove the following parts:
a. Trunk end trim.
b. Rear scuff plate (RH).
c. Trunk side trim (RH).
d. Theft-deterrent horn.
3. Apply battery positive voltage to horn terminal A, and connect the horn retaining
bolt to ground as shown in the f ...
Center Roof Antenna
Purpose, Function
Converts radio broadcast waves to electric signals and sends the signals
to the audio unit.
Construction
A center roof antenna has been adopted which does not require retraction
or removal before going through an automatic car wash machine.
The ...
Rear Beltline Molding Removal/Installation
CAUTION:
Affix protective tape to the position shown in the figure.
1. Fully open the rear door glass.
2. Insert a tape-wrapped flathead screwdriver and then detach the clip A in the
direction of arrow (1) shown in the figure.
3. Pull up the rear belt line molding in the di ...
