Mazda CX-5 Service & Repair Manual: Front Door Latch And Lock Actuator Removal/Installation
1. Perform the front door glass preparation..
2. Disconnect the negative battery cable..
3. Remove the following parts:
a. Inner garnish.
b. Front door trim.
c. Inner handle.
d. Front door glass.
e. Front door module panel.
f. Front door key cylinder.
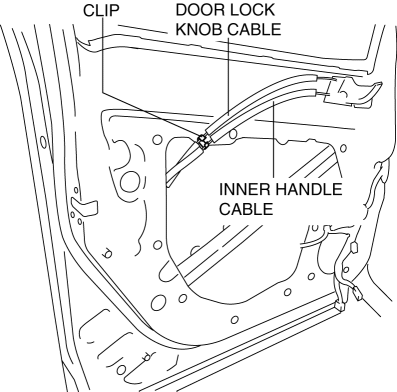
4. Remove the door lock knob cable and inner handle cable from the clip.

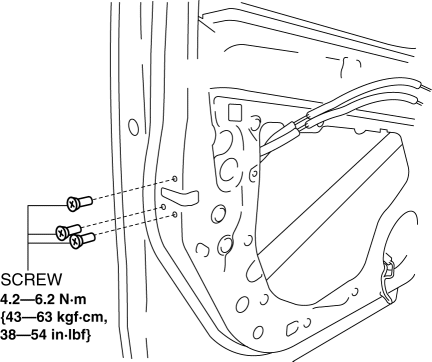
5. Remove the screws.

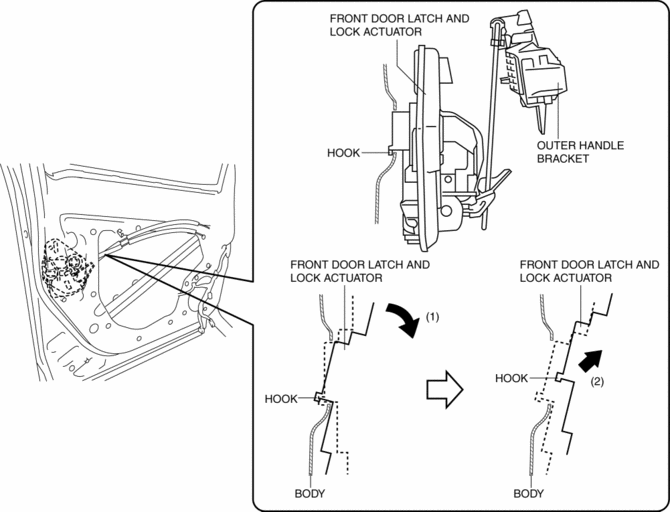
6. Tilt the front door latch and lock actuator in the direction of arrow (1) shown in the figure and lift it in the direction of arrow (2) to detach the hook of the front door latch and lock actuator.

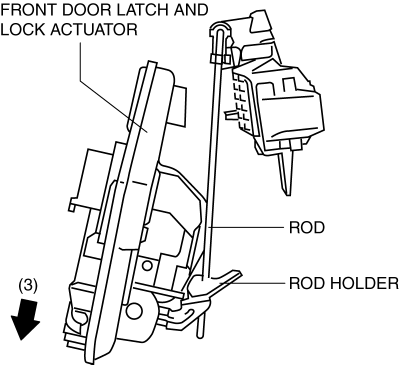
7. Move the front door latch and lock actuator down in the direction of arrow (3) shown in the figure to remove the rod from the rod holder.

8. Remove the front door latch and lock actuator.
9. Install in the reverse order of removal.
 Front Door Latch And Lock Actuator Inspection
The following actuator and switches are integrated with the front door latch
and lock actuator.
From the actuator/switch name and operation in the following table, select
the a ...
 Front Door Latch Switch
Purpose, Function
Switches on/off in conjunction with the latch lever rotation, and detects
the front door open/closed condition by the voltage which is changed by the
rear body control m ...
Other materials:
Fuel Gauge Sender Unit Removal/Installation [Awd]
WARNING:
Always keep sparks and flames away from fuel when servicing the fuel system.
Fuel can be easily ignited which could cause serious injury or death, and damage
to equipment.
Fuel line spills and leakage from the pressurized fuel system are dangerous.
Fuel can ignite a ...
Solar Radiation Sensor [Full Auto Air Conditioner]
Purpose
The solar radiation sensor detects the sunlight intensity emitted to the
cabin.
Function
The solar radiation sensor converts the detected solar radiation amount to
an electric signal.
Construction
A photodiode (light receiving diode) has been adopted fo ...
PID/Data Monitor Inspection [Two Step Deployment Control System]
1. Connect the M-MDS to the DLC-2.
2. After the vehicle is identified, select the following items from the initialization
screen of the M-MDS.
a. Select “DataLogger”.
b. Select “Modules”.
c. Select “RCM”.
3. Select the applicable PID from the PID table.
4. Verify the PID da ...
