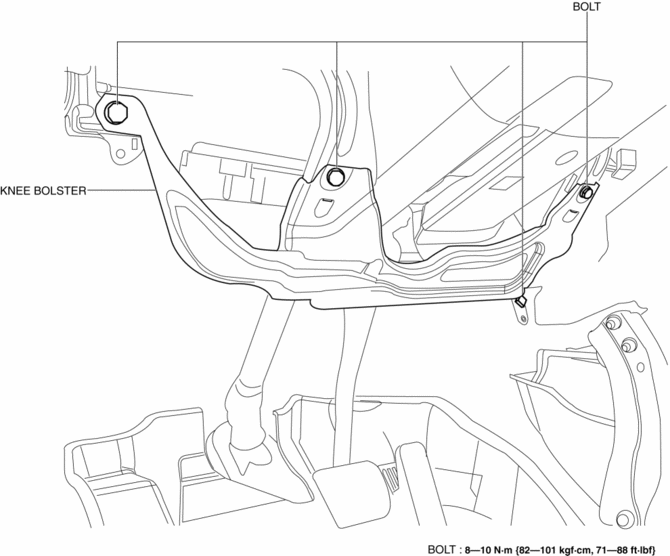
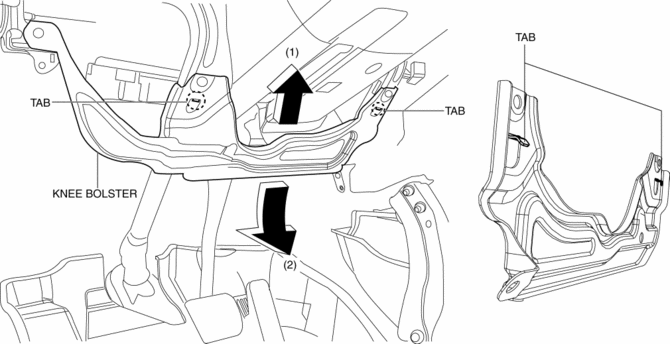
Mazda CX-5 Service & Repair Manual: Knee Bolster Removal/Installation
1. Disconnect the negative battery cable..
2. Remove the following parts:
a. Driver-side front scuff plate.
b. Driver-side front side trim.
c. Switch panel.
d. Decoration panel.
e. Shift lever knob (MTX).
f. Front console box.
g. Shift panel.
h. Upper panel.
i. Rear console.
j. Side wall.
k. Front console.
l. Hood release lever.
m. Driver-side lower panel.
3. Remove bolts.
4. Pull the knee bolster in the direction of the arrow in the order of (1), (2) while detaching tabs.
5. Install in the reverse order of removal.
 Glove Compartment Removal/Installation
1. Push the glove compartment in the direction of the arrow (1) and remove hooks
A.
2. Pull the stay damper in the direction of the arrow (2) shown in the figure
and remove the hook B.
CAU ...
 Rear Console Disassembly/Assembly
1. Disassemble in the order indicated in the table.
1
Screw A
2
Rear console bracket
3
Screw B
4
...
Other materials:
Fuel Injector Relay
Purpose, Function
Supplies power to the PCM for the fuel injector and spill valve control solenoid
valve operation.
Construction
The fuel injector relay is installed in the relay and fuse block.
Operation
When the ignition is switched ON, the battery voltage ...
Instrument Cluster Configuration (Using Read/Write Function)
NOTE:
When performing configuration, it is necessary to read the vehicle specification
information from the instrument cluster before replacing it. Connect the M-MDS
to the vehicle and perform vehicle identification before removing the instrument
cluster. The vehicle specification i ...
Side Sill Panel Installation [Panel Replacement]
Symbol Mark
Installation Procedure
Side sill (front side)
1. When installing new parts, measure and adjust the body as necessary to conform
with standard dimensions.
2. Drill holes for the plug welding before installing the new parts.
3. After temporarily installing new parts, make sure ...
