Mazda CX-5 Service & Repair Manual: Rear Seat Center Armrest Removal/Installation
1. Operate the push knob (RH) and lower the rear seat back (RH).
2. Remove screw A.
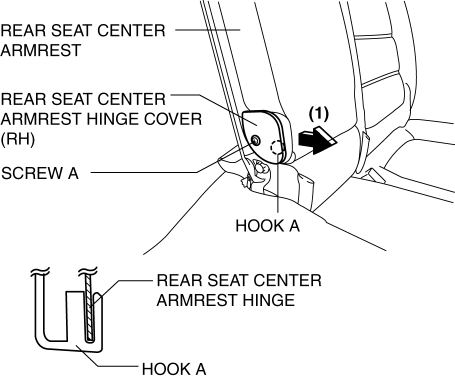
3. Remove the rear seat center armrest hinge cover (RH) in the direction of the arrow (1) shown in the figure while setting hook A aside.
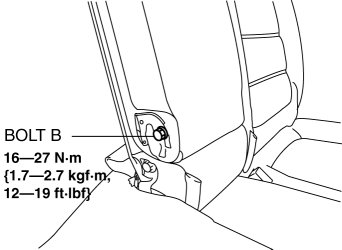
4. Remove bolt B.
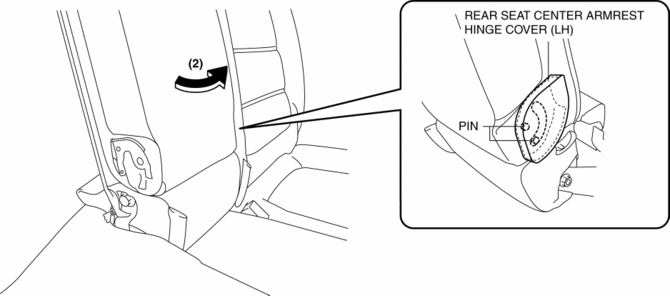
5. Remove the rear seat center armrest in the direction of the arrow (2) shown in the figure while setting the pins aside.
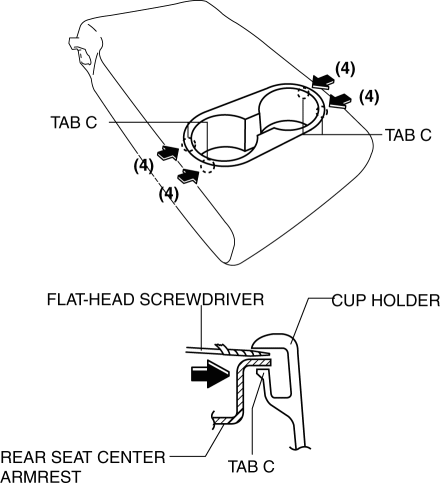
6. Using a flathead screwdriver wrapped in protective tape, insert it in the gap between the cup holder and the rear seat center armrest in the direction of the arrow (3) shown in the figure, and disengage tabs B.
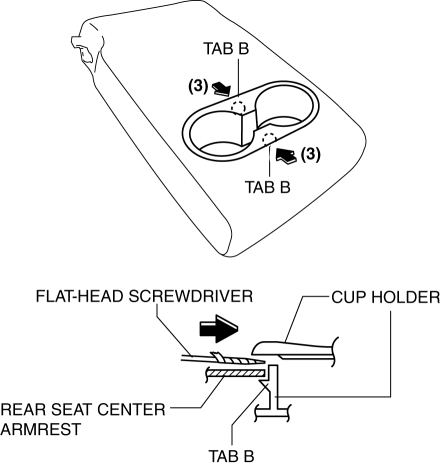
7. Using a flathead screwdriver wrapped in protective tape, insert it in the gap between the cup holder and the rear seat center armrest in the direction of the arrow (4) shown in the figure, and disengage tabs C.
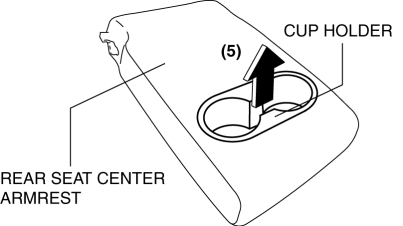
8. Remove the cup holder in the direction of the arrow (5) shown in the figure.
9. Install in the reverse order of removal.
 Rear Console Removal/Installation
1. Disconnect the negative battery cable..
2. Remove the following parts:
a. Front console box.
b. Shift lever knob (MTX).
c. Shift panel.
d. Upper panel.
3. Remove screws A.
4. Remo ...
 Sunvisor Removal/Installation
1. Disconnect the negative battery cable. (with vanity mirror illumination).
2. Remove the screw A.
3. Rotate the sunvisor in the direction of the arrow.
4. Unhook and remove the sunvisor. ...
Other materials:
Auxiliary Jack/Usb Port Inspection
Auxiliary jack inspection
1. Disconnect the negative battery cable..
2. Remove the following parts:
a. Upper console.
b. Auxiliary jack/USB port.
3. Connect a commercially-available plug to the external input unit.
4. Verify that the continuity between the external input unit terminal ...
Precaution
Intermittent Concern Troubleshooting
Vibration method
If a malfunction occurs or becomes worse while driving on a rough road or
when the engine is vibrating, perform the following steps.
NOTE:
There are several reasons why vehicle or engine vibration could cause an
electr ...
Antenna Feeder No.2 Inspection
1. Disconnect the negative battery cable..
2. Remove the following parts:
a. A-pillar trim (RH).
b. Trunk board.
c. Trunk end trim (RH).
d. Rear scuff plate (RH).
e. Trunk side trim (RH).
3. Disconnect antenna feeder No.1.
4. Disconnect antenna feeder No.3.
5. Verify that t ...
