Mazda CX-5 Service & Repair Manual: Windshield Wiper Arm And Blade Removal/Installation
Windshield Wiper Arm
1. Open the hood.
CAUTION:
-
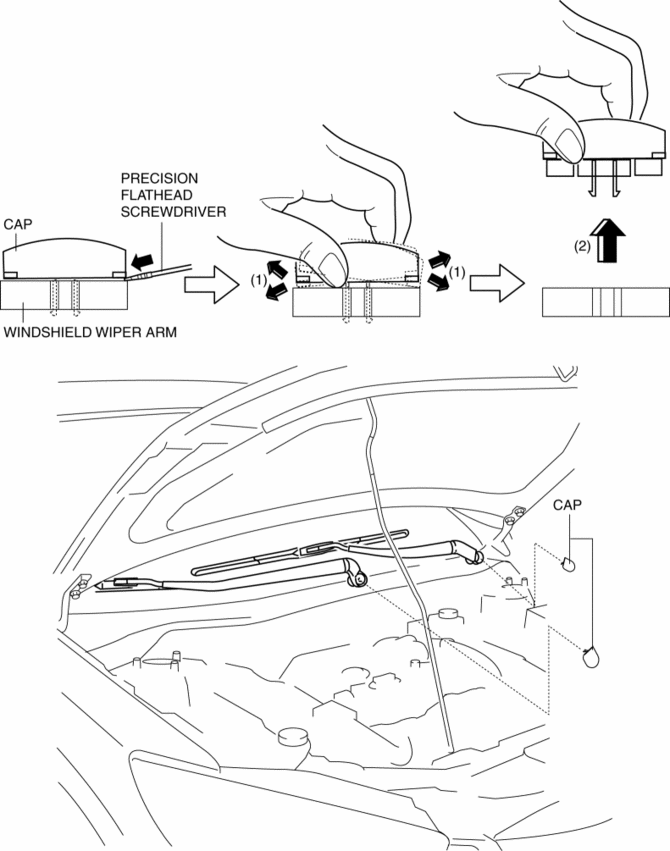
If excessive force is applied when removing the cap, tabs could break. Carefully remove the cap.
2. Insert a tape-wrapped precision flathead screwdriver into the gap between the windshield wiper arm and cap, and slightly raise the cap.
3. Detach cap tabs from the windshield wiper arm while slightly moving the cap in the direction of the arrows (1) shown in the figure, carefully pull it up in the direction of the arrow (2), and remove it.
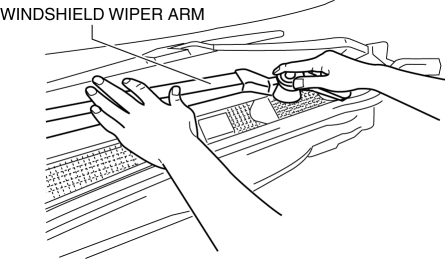
4. Loosen nuts until it is jointed temporarily with the windshield wiper arm pressed as shown in the figure.
5. Close the hood.
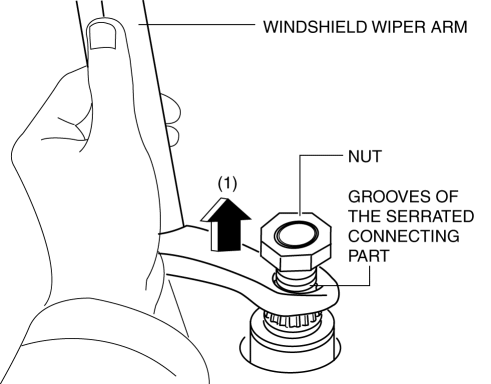
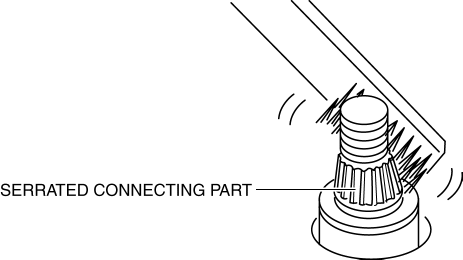
6. Raise the windshield wiper arm as shown in the figure and pull it up until the temporary joint nut points outward in the direction of the arrow (1) from the serrated connecting part.
CAUTION:
-
Always temporarily tighten the temporary joint nut when removing the windshield wiper arm. If it is removed from the serrated connecting part without temporarily tightening the nut, the windshield wiper arm could contact the hood.
7. Remove the nut.
8. Remove the windshield wiper arm..
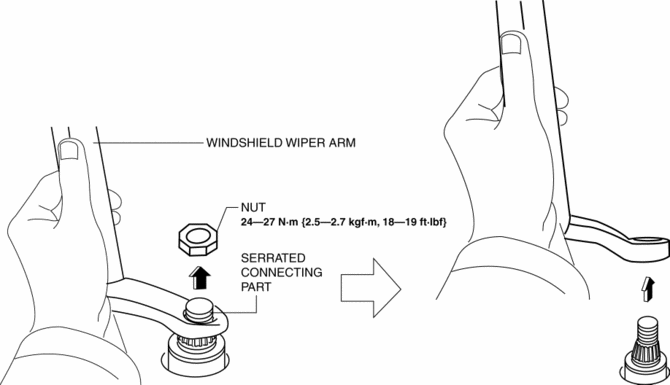
9. Install in the reverse order of removal.
10. Adjust the windshield wiper arm and blade..
Windshield Wiper Blade
CAUTION:
-
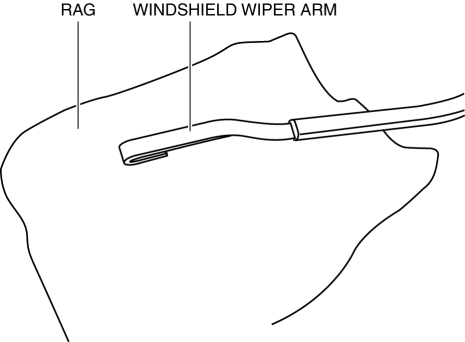
If the windshield wiper arm end is placed directly on the windshield after removing the windshield wiper blade, it could scratch the windshield. If the windshield wiper arm end is placed on the windshield, place it on a rag to protect the windshield.
1. Pull the windshield wiper blade tab up in the direction of the arrow (1).
2. Press the windshield wiper blade end in the direction of the arrow (3) while tilting it in the direction of the arrow (2).
3. Remove the windshield wiper blade in the direction of the arrow (4) from the windshield wiper arm.
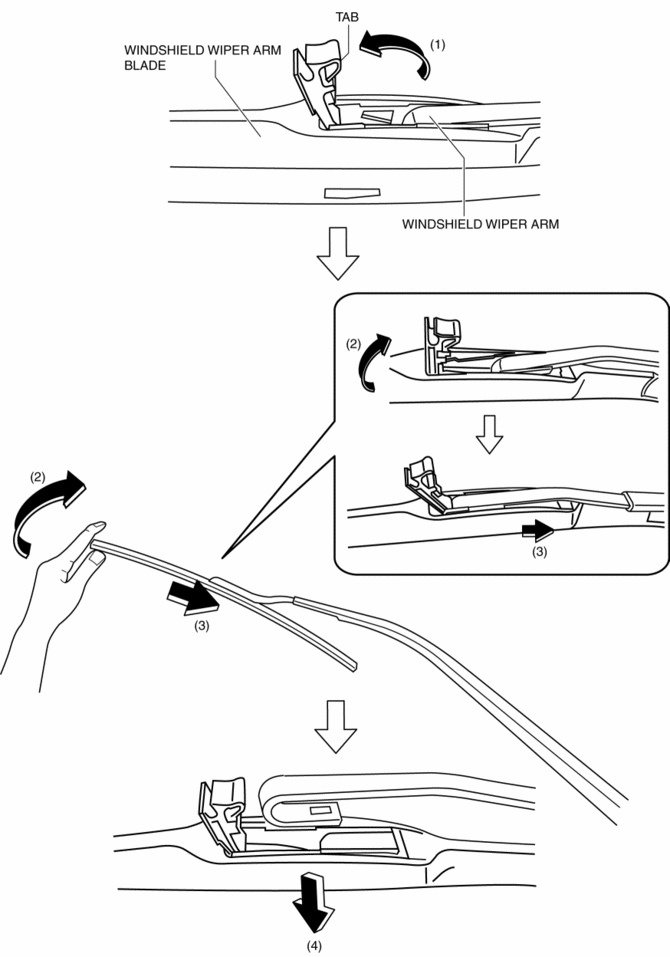
4. Install in the reverse order of removal.
Windshield Wiper Arm Installation Note
1. Clean the serrated connecting part with a wire brush before installing the windshield wiper arm.
 Windshield Wiper Arm And Blade Adjustment
1. Switch the ignition ON (engine off or on).
2. Operate the windshield wiper at low speed.
3. Verify that the windshield wiper operates at low speed and stop the windshield
wiper.
4. Verify t ...
 Windshield Wiper Motor
Purpose
The windshield wiper motor transmits rotation force to the windshield wiper
link to operate the windshield wiper arms and blades.
Function
The windshield wiper motor ope ...
Other materials:
Cooling System Cap Inspection
WARNING:
Never remove the cooling system cap or loosen the radiator drain plug while
the engine is running, or when the engine and radiator are hot. Scalding engine
coolant and steam may shoot out and cause serious injury. It may also damage
the engine and cooling system.
Tu ...
Fuel Gauge Sender Unit Removal/Installation [2 Wd]
WARNING:
Always keep sparks and flames away from fuel when servicing the fuel system.
Fuel can be easily ignited which could cause serious injury or death, and damage
to equipment.
Fuel line spills and leakage from the pressurized fuel system are dangerous.
Fuel can ignite a ...
Fully Automatic Type
Climate control information is displayed on the display.
Control Switches
AUTO switch
By pressing the AUTO switch the following functions will be automatically controlled
in accordance with the selected set temperature:
• Airflow temperature
• Amount of airflow
• Selection of airflow ...
