Mazda CX-5 Service & Repair Manual: A Pillar Trim Removal/Installation
1. Partially peel back the seaming welt.
2. Take the shaded area shown in the figure, and pull the A-pillar trim in the direction of the arrow (1) while detaching clip A, clips B.
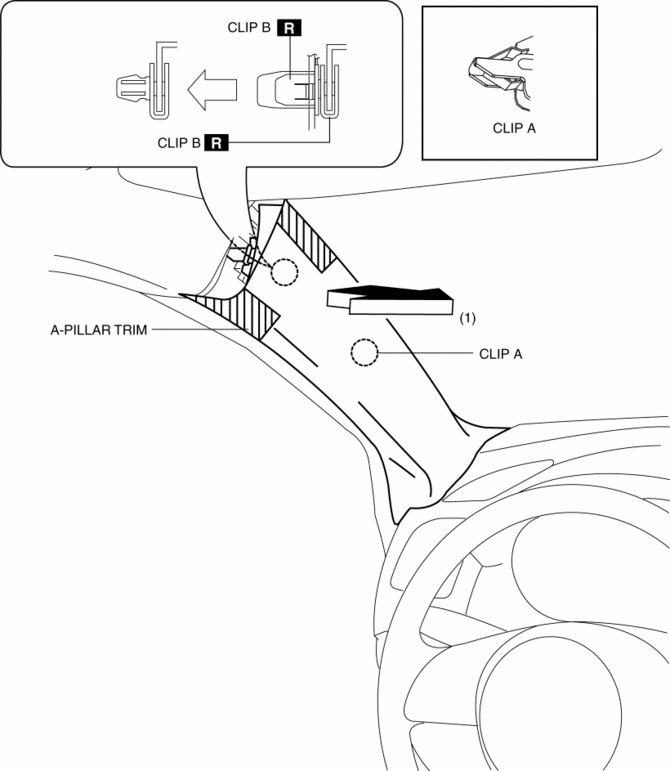
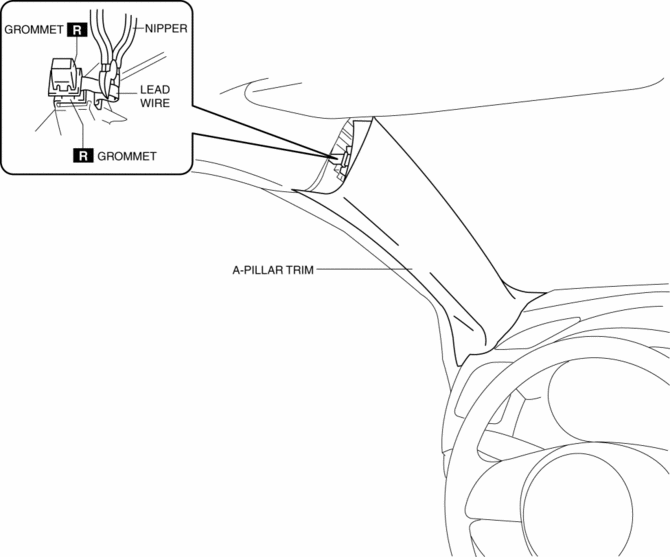
3. Cut the lead wire connecting clips B and grommet using a nipper.
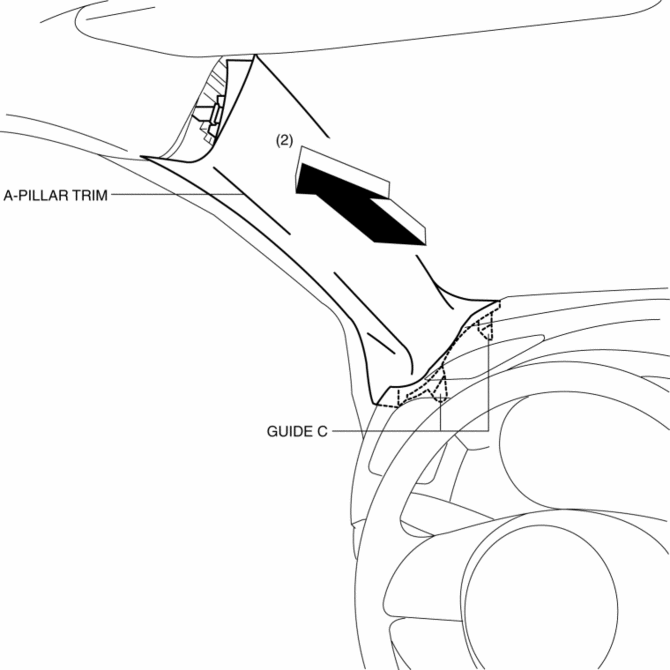
4. Pull the A-pillar trim in the direction of the arrow in the order of (2) and remove the A-pillar trim while detaching guides C.
5. Move the hook in the direction of arrows (3) and (4) shown in the figure using a tape-wrapped flathead screwdriver and detach it from the front pillar inner panel.

6. Remove the grommet in the direction of the arrow (5) shown in the figure.
7. When installing the A-pillar, install new clips B and grommet to the A-pillar trim in advance.
8. Install in the reverse order of removal.
 General
...
 Anticorrosion, Sound Insulation, And Vibration Insulation
Body Sealing
Apply body sealer where necessary.
For locations where application of body sealer is difficult after installation,
apply it before installation.
Application of ...
Other materials:
Intake Air Temperature (Iat) Sensor Inspection
IAT Sensor No.1
Resistance inspection
NOTE:
Because the IAT sensor No.1 is integrated in the MAF sensor, replacing the
IAT sensor No.1 includes replacement of the MAF sensor/IAT sensor No.1.
1. Disconnect the negative battery cable..
2. Disconnect the MAF sensor/IAT sensor No.1 ...
Hazardous Driving
WARNING
Be extremely careful if it is necessary to downshift on slippery surfaces: Downshifting
into lower gear while driving on slippery surfaces is dangerous. The sudden change
in tire speed could cause the tires to skid.
This could lead to loss of vehicle control and an accident.
When driv ...
Center Pillar Installation [Panel Replacement]
Symbol Mark
Installation Procedure
1. When installing new parts, measure and adjust the body as necessary to conform
with standard dimensions.
2. Drill holes for the plug welding before installing the new parts.
3. After temporarily installing new parts, make sure the related parts fit p ...
