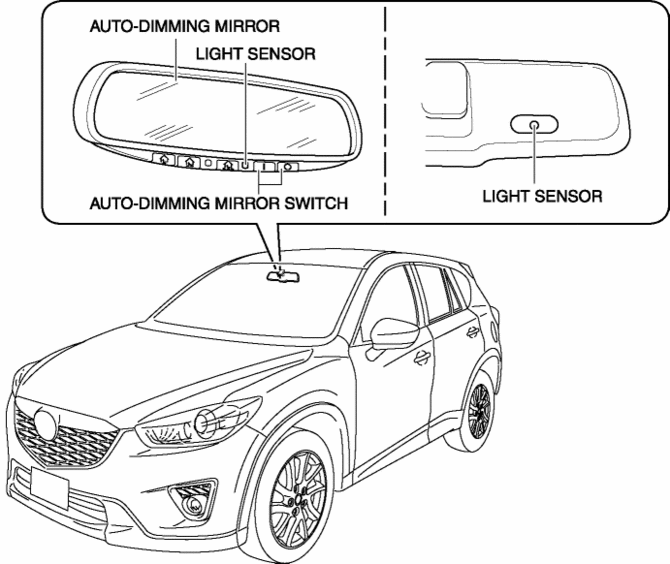
Mazda CX-5 Service & Repair Manual: Auto Dimming Mirror
Purpose
-
The automatic glare prevention rearview mirror prevents the driver from being affected by light from vehicles at the rear.
Structural view
System wiring diagram

Function
-
The automatic glare prevention rearview mirror detects the level of the surrounding light and glare from vehicles at the rear using the light sensor.
-
The automatic glare prevention rearview mirror combines the level of the surrounding light and the glare from vehicles at the rear and changes the reflection rate of the mirror between 10% and 70%.
-
When the automatic glare prevention rearview mirror receives a reverse signal from the rear body control module (RBCM), the reflection rate of the mirror is fixed at 70% or more.
Operation
-
When the automatic glare prevention rearview mirror switch is turned on, the mirror switches to automatic glare prevention mode.
-
While in automatic glare prevention mode, the light sensor detects the level of surrounding light and the glare from vehicles at the rear.(1)
-
The automatic glare prevention rearview mirror changes the voltage applied to the mirror according to the level of the surrounding light and the glare from vehicles at the rear.(2)
-
The mirror changes the reflection rate between 10% and 70% according to the voltage that is applied.
-
However, if it receives a reverse signal from the rear body control module (RBCM) (3), the reflection rate of the mirror is fixed at 70% or more.

Fail-safe
-
Function not equipped
 Mirrors
...
 Auto Dimming Mirror Inspection
1. Measure the voltage at each terminal.
If the voltage is not as specified in the Terminal Voltage Table (Reference),
inspect the parts under “Inspection item (s)” and related wiring h ...
Other materials:
Flywheel Inspection [C66 M R]
1. Remove the flywheel..
2. Perform the following procedures to inspect the flywheel.
If there is any malfunction or it exceeds the maximum specification, replace
the flywheel..
a. Inspect the surface that contacts the clutch disc for scratches, nicks, and
discoloration.
...
Initial Learning [Fw6 A EL, Fw6 Ax EL]
Introduction
If the control valve body and oil pressure switch are replaced, always perform
the initial learning. If the initial learning is not completed, engine rev-up
may occur or shift shock may increase. DTC P06B8:00 is displayed while the initial
learning has not been implement ...
Rear Body Control Module (Rbcm) Configuration (Using Read/Write Function)
NOTE:
When performing configuration, it is necessary to read the vehicle specification
information from the rear body control module (RBCM) before replacing it. Connect
the M-MDS to the vehicle and perform vehicle identification before removing
the rear body control module (RBCM). T ...
