Mazda CX-5 Service & Repair Manual: Rear Crossmember Removal/Installation [Awd]
WARNING:
-
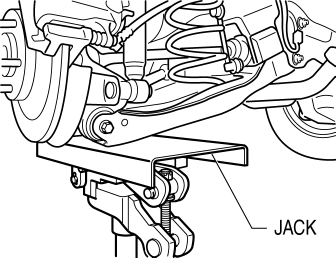
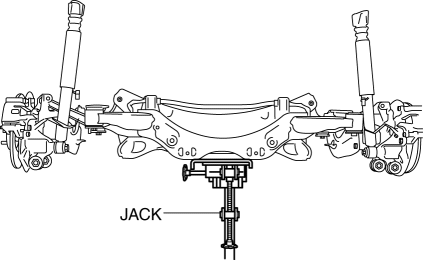
Verify that the crossmember is securely supported by a jack. If the rear crossmember falls off, it can cause serious injury or death, and damage to the vehicle.
CAUTION:
-
Performing the following procedures without first removing the rear ABS wheel-speed sensor may possibly cause an open circuit in the harness if it is pulled by mistake. Before performing the following procedures, disconnect the rear ABS wheel-speed sensor (axle side) and fix it to an appropriate place where the sensor will not be pulled by mistake while servicing the vehicle.
NOTE:
-
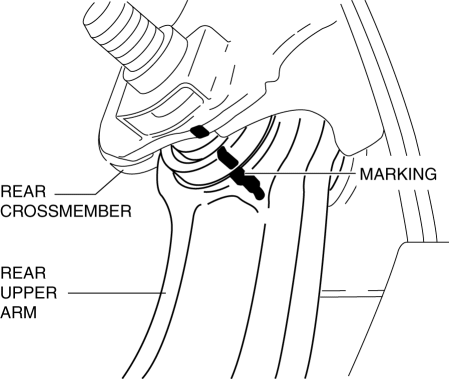
Mark the position before removing the rear upper arm.
-
Align the rear crossmember and rear upper arm markings when installing the rear upper arm.
-
Tighten the rear upper arm inner bolt completely before installing the rear crossmember component to the vehicle.
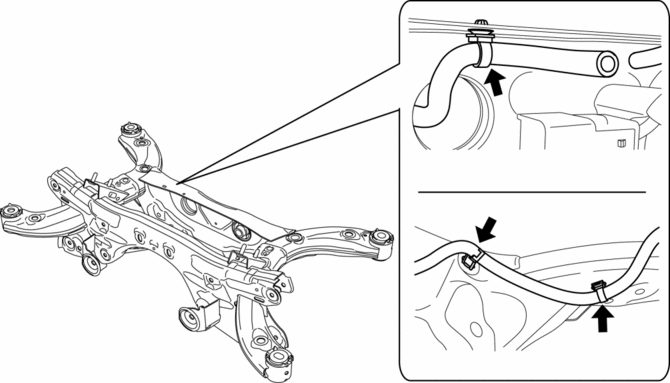
1. Disconnect the wiring harness clips and connectors installed to the rear crossmember.
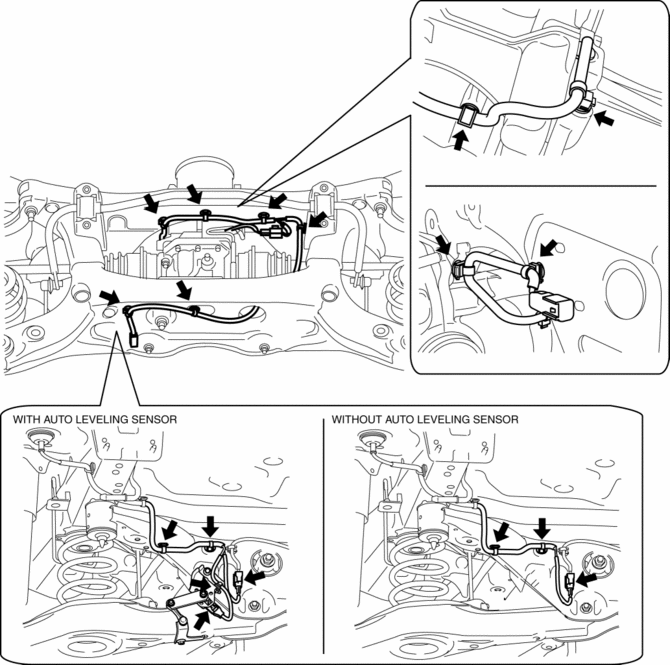
2. Set the rear differential breather hose aside.
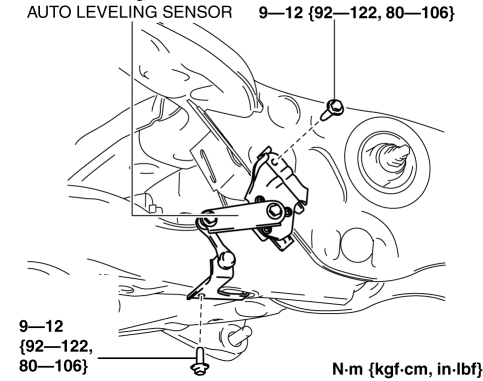
3. Remove the auto leveling sensor. (With auto leveling sensor).
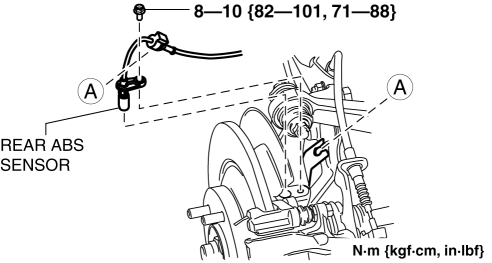
4. Disconnect the rear ABS wheel-speed sensor wiring harness installed to rear hub support, then move aside the rear ABS sensor..
5. Jack up the vehicle to the unloaded condition, and support the rear trailing link component using a jack.
6. Align the rear crossmember component and rear upper arm and mark them.
7. Remove the propeller shaft..
8. Remove the TWC..
9. Remove the rear lateral link..
10. Remove the rear coil spring..
11. Remove the rear lower arm..
12. Remove the rear drive shaft..
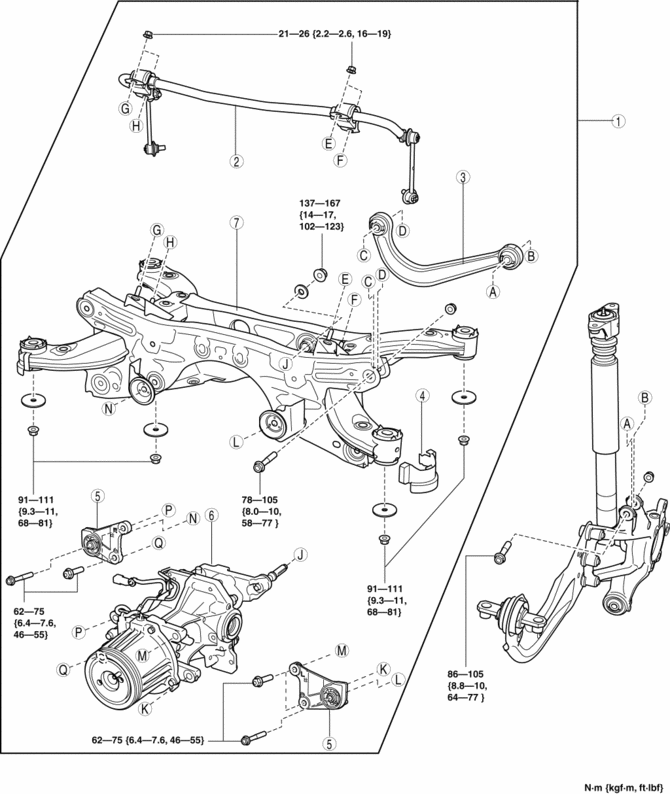
13. Remove in the order indicated in the table.
14. Install in the reverse order of removal.
15. Inspect the wheel alignment and adjust it if necessary..
|
1 |
Rear crossmember component (See Rear Crossmember Component Removal Note.) (See Rear Crossmember Component Installation Note.) |
|
2 |
Rear stabilizer component |
|
3 |
Rear upper arm . |
|
4 |
Rear crossmember mudguard |
|
5 |
Front differential mounting rubber (See REAR DIFFERENTIAL REMOVAL/INSTALLATION.) |
|
6 |
Rear differential component (See REAR DIFFERENTIAL REMOVAL/INSTALLATION.) |
|
7 |
Rear crossmember |
Rear Crossmember Component Removal Note
WARNING:
-
Verify that the rear crossmember is securely supported by a jack. If the rear crossmember falls off, it can cause serious injury or death, and damage to the vehicle.
1. Support the rear crossmember component with the jack and remove the nut.
2. Remove the rear crossmember component.
Rear Crossmember Component Installation Note
WARNING:
-
Verify that the rear crossmember is securely supported by a jack. If the rear crossmember falls off, it can cause serious injury or death, and damage to the vehicle.
1. Support the rear crossmember component and install the rear crossmember.
 Rear Crossmember Removal/Installation [2 Wd]
WARNING:
Verify that the rear crossmember is securely supported by a jack. If the
rear crossmember falls off, it can cause serious injury or death, and damage
to the vehicle.
CAUTI ...
 Rear Pillar (Outer) Installation [Panel Replacement]
Symbol Mark
Installation Procedure
1. When installing new parts, measure and adjust the body as necessary to conform
with standard dimensions.
2. Drill holes for the plug welding before inst ...
Other materials:
Pre Delivery Inspection
Pre?Delivery Inspection Table
Exterior
INSPECT and ADJUST, if necessary, the following items to specification:
?Glass, exterior bright metal and paint for damage
?Wheel lug nuts
?All weatherstrips for damage or detachment
?Adjust tire pressures to specification
Adjust the tire pr ...
Clock Spring Inspection [Standard Deployment Control System]
1. Disconnect the negative battery cable and wait for 1 min or more..
2. Remove the driver?side air bag module..
3. Remove the steering wheel..
4. Remove the column cover..
5. Remove the clock spring..
6. Verify that the continuity is as indicated in the table.
If not as indicated ...
Seat Warmer Unit Inspection
WARNING:
Handling a side air bag improperly can accidentally operate (deploy) the
air bag, which may seriously injure you. Read the service warnings/cautions
in the Workshop Manual before handling the front seat (side air bag integrated)..
CAUTION:
If the slide bar is ope ...
