Mazda CX-5 Service & Repair Manual: Rear Seat Center Armrest Removal/Installation
1. Operate the push knob (RH) and lower the rear seat back (RH).
2. Remove screw A.
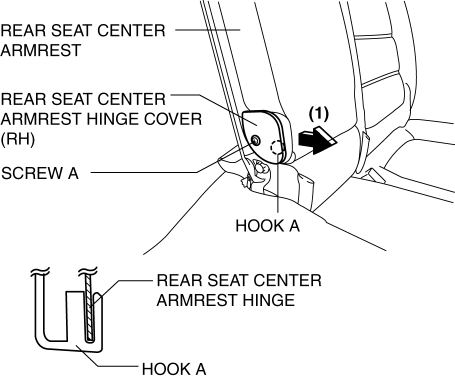
3. Remove the rear seat center armrest hinge cover (RH) in the direction of the arrow (1) shown in the figure while setting hook A aside.
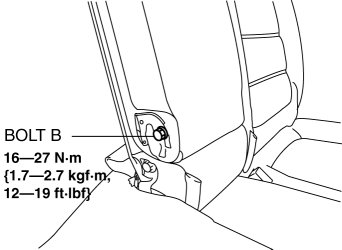
4. Remove bolt B.
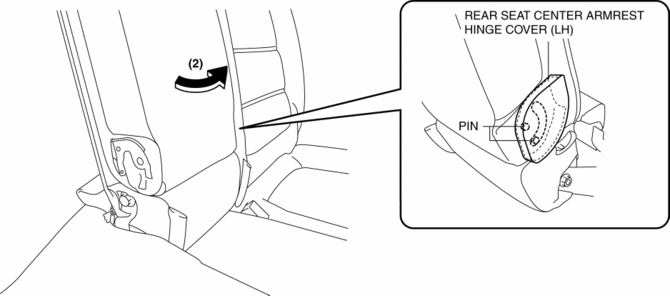
5. Remove the rear seat center armrest in the direction of the arrow (2) shown in the figure while setting the pins aside.
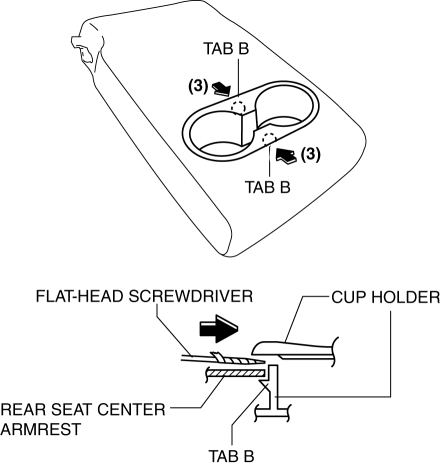
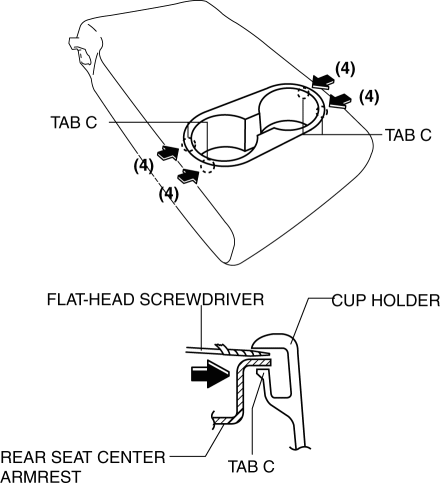
6. Using a flathead screwdriver wrapped in protective tape, insert it in the gap between the cup holder and the rear seat center armrest in the direction of the arrow (3) shown in the figure, and disengage tabs B.
7. Using a flathead screwdriver wrapped in protective tape, insert it in the gap between the cup holder and the rear seat center armrest in the direction of the arrow (4) shown in the figure, and disengage tabs C.
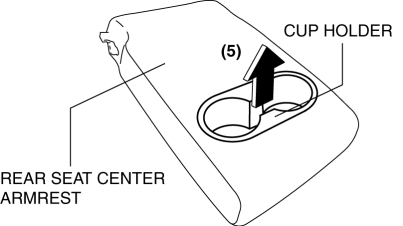
8. Remove the cup holder in the direction of the arrow (5) shown in the figure.
9. Install in the reverse order of removal.
 Rear Seat Back Trim Removal/Installation
6:4 Split Type
1. Remove the trunk board..
2. Remove the rear seat back..
3. Remove the headrest.
4. Remove the rear seat back frame..
5. Remove the C rings in the order of (1), (2), (3), and ...
 Rear Seat Cushion Removal/Installation
CAUTION:
When removing or putting in the rear seat cushion, contact with the surrounding
areas of the vehicle could cause scratches and damage. When removing or putting
in the rear seat ...
Other materials:
Pre Tensioner Seat Belt [Standard Deployment Control System]
Purpose
The pre-tensioner seat belt retracts and tightens the seat belt webbing to
protect the front passengers during a collision.
Function
The pre-tensioner seat belts operate (deploy) based on the operation signal
from the SAS control module to instantly retract and tigh ...
Rain Sensor Removal/Installation
1. Disconnect the negative battery cable..
2. Spread open the rain sensor cover in the direction of the arrows (1) and disengage
tabs A to remove it.
3. Disconnect the rain sensor connector in the direction of the arrow (2).
4. Slide rain sensor tabs B in the direction of the arrow ...
Rear Seat Cushion Removal/Installation
CAUTION:
When removing or putting in the rear seat cushion, contact with the surrounding
areas of the vehicle could cause scratches and damage. When removing or putting
in the rear seat cushion, always use two or more persons to perform the work
and be careful not to scratch or dama ...
