Mazda CX-5 Service & Repair Manual: A Pillar Trim Removal/Installation
1. Partially peel back the seaming welt.
2. Take the shaded area shown in the figure, and pull the A-pillar trim in the direction of the arrow (1) while detaching clip A, clips B.
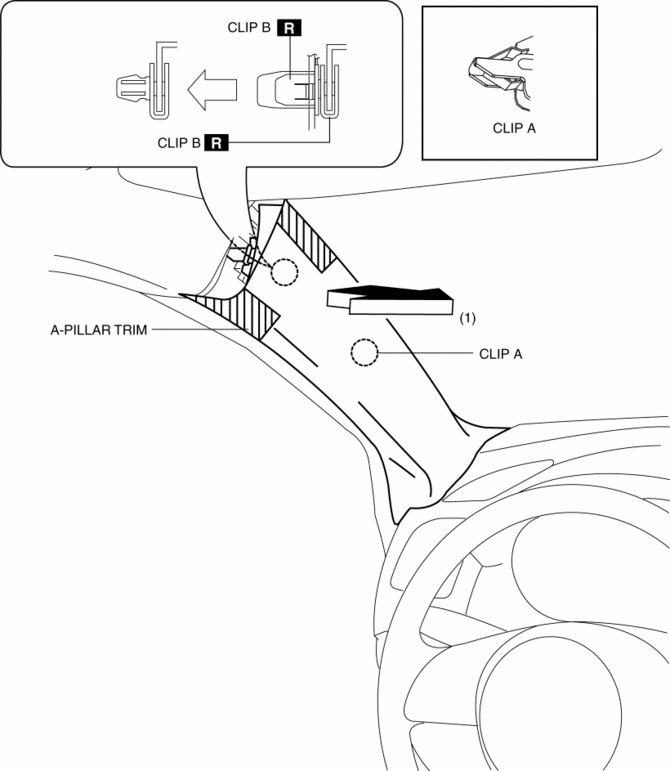
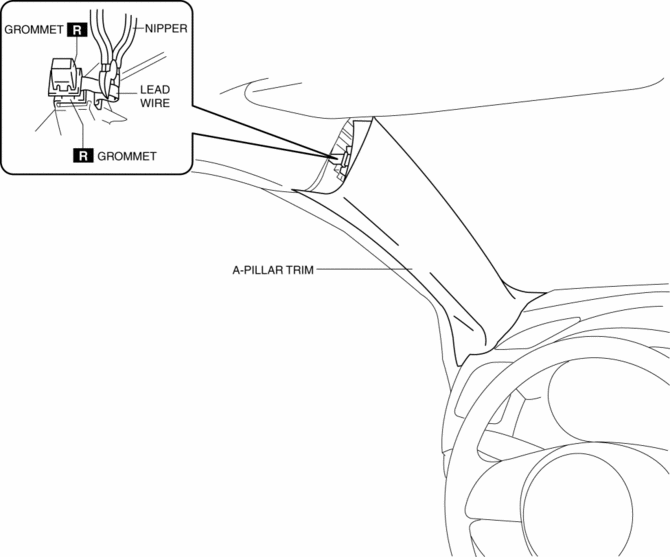
3. Cut the lead wire connecting clips B and grommet using a nipper.
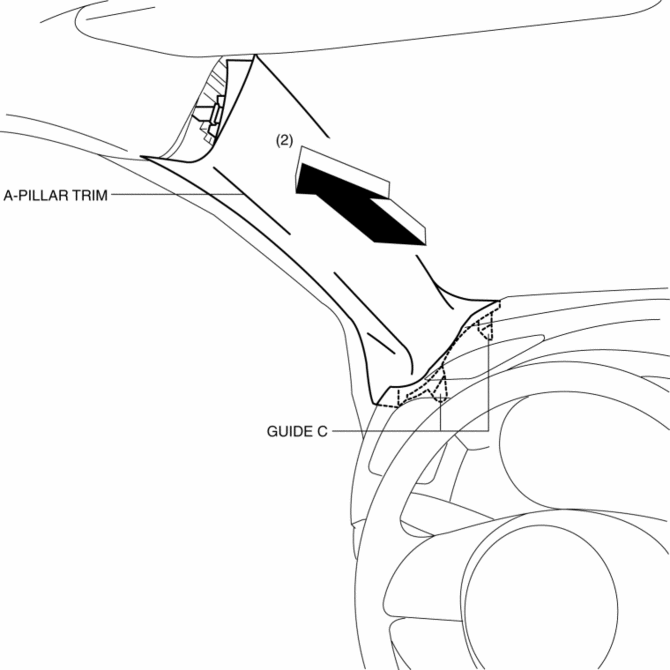
4. Pull the A-pillar trim in the direction of the arrow in the order of (2) and remove the A-pillar trim while detaching guides C.
5. Move the hook in the direction of arrows (3) and (4) shown in the figure using a tape-wrapped flathead screwdriver and detach it from the front pillar inner panel.

6. Remove the grommet in the direction of the arrow (5) shown in the figure.
7. When installing the A-pillar, install new clips B and grommet to the A-pillar trim in advance.
8. Install in the reverse order of removal.
 General
...
 Anticorrosion, Sound Insulation, And Vibration Insulation
Body Sealing
Apply body sealer where necessary.
For locations where application of body sealer is difficult after installation,
apply it before installation.
Application of ...
Other materials:
Control Valve Body [Fw6 A EL, Fw6 Ax EL]
Purpose/Function
A direct linear solenoid has been adopted for the solenoid valve which contributes
to improved shift response, drive feel and reduced shift shock by the improved
precision of the hydraulic pressure control.
Construction
The control valve body consists of in ...
Headlight Aiming
NOTE:
Perform headlight aiming if any of the following work is performed.
Front combination light replacement
Work that can affect vehicle height such as suspension replacement or
removal/installation.
1. Empty the vehicle by having all occupants leav ...
Engine Transaxle Integration Control [Fw6 A EL, Fw6 Ax EL]
Outline
The TCM controls engine output torque and reduces transaxle output shaft
torque fluctuation during auto shifting, and reduces shock occurring from the
vehicle during shifting.
Construction
Operation
During auto shifting, the TCM sends the torque reduction reque ...
