Mazda CX-5 Service & Repair Manual: Rear Door Quarter Glass Removal/Installation
1. Fully lower the rear door glass.
2. Disconnect the negative battery cable..
3. Remove the rear door trim..
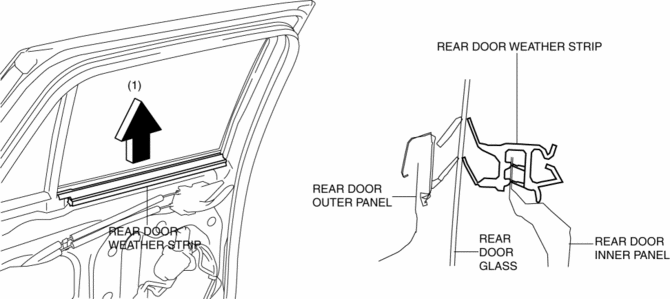
4. Remove the rear door weather strip arrow (1) shown in the figure.
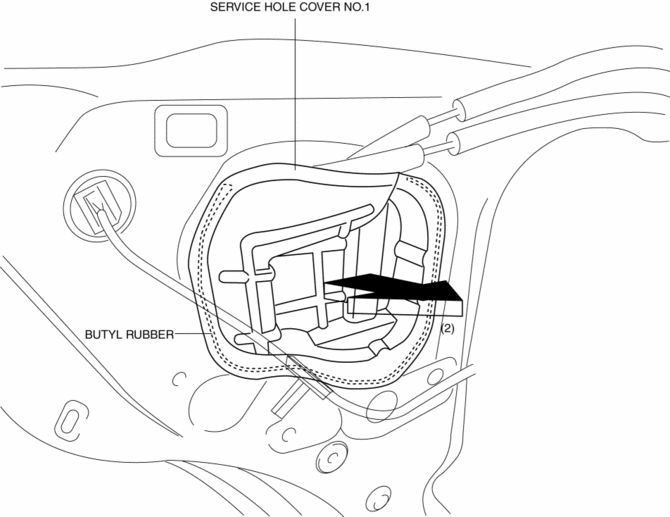
5. Remove the service hole cover No.1 arrow (2) shown in the figure.
CAUTION:
-
When removing service hole cover No.1, remove it while gradually stripping the butyl rubber. Otherwise service hole cover No.1 may be deformed.
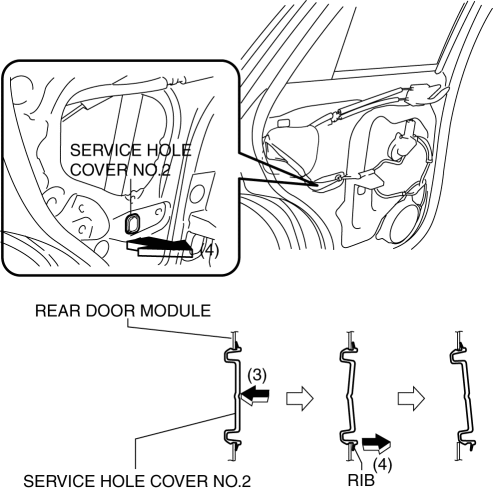
6. Remove the service hole cover No.2 arrow in the order of (3), (4) shown in the figure.
7. Partially peel back rear door weather strip.
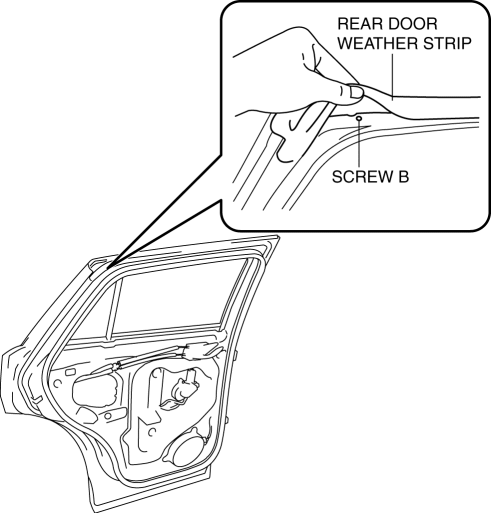
8. Remove screw B.
9. Remove bolts C.
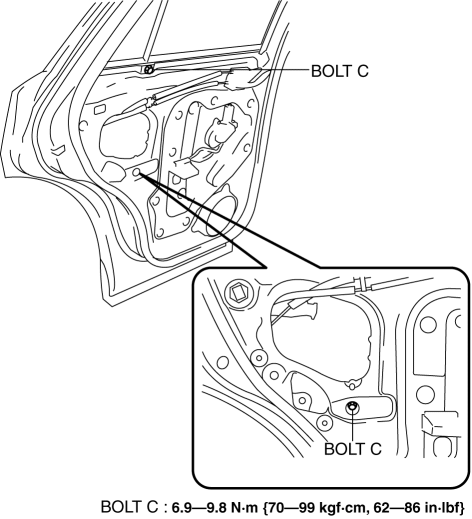
10. Partially peel back the rear door glass run channel.
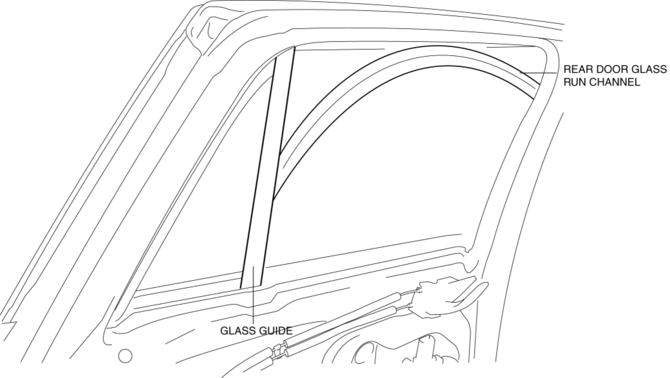
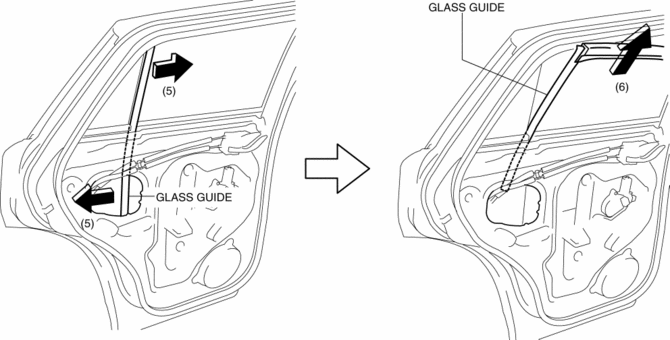
11. Pull the glass guide in the direction of the arrow (5) shown in the figure, then remove the glass guide direction of the arrow (6) shown in the figure..
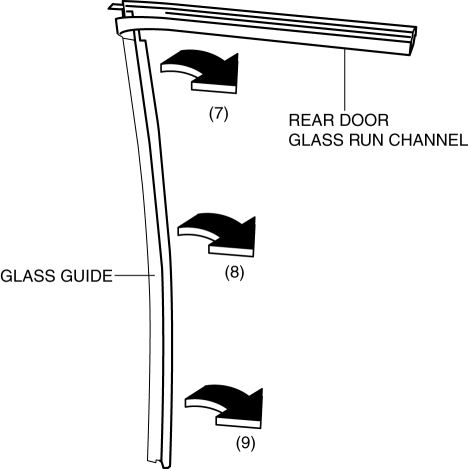
12. Pull the rear door glass run channel in the direction of the arrow in the order of (7),(8),(9) then remove the rear door glass run channel.
13. Slide the rear door quarter glass and rear door quarter glass guide as a single unit in the direction of the arrow (10) shown in the figure.
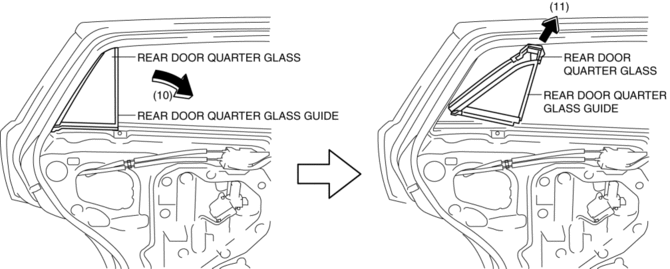
14. Remove the rear door quarter glass and rear door quarter glass guide as a single unit in the direction of the arrow (11) shown in the figure.
15. Pull the rear door quarter glass guide in the direction of the arrow in the order of (12), (13), (14) and remove the rear door quarter glass.

16. Install in the reverse order of removal.
Rear Door Glass Run Channel Installation Note
-
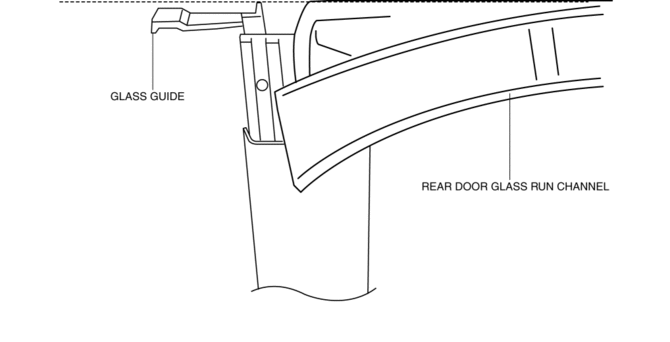
Install the rear door glass run channel so that the glass guide is aligned with the top of the rear door glass run channel.
Glass Guide Installation Note
1. Set the glass guide in the direction shown in the figure, and insert the bolt installation hole in the direction of arrow (1) until it reaches area A.
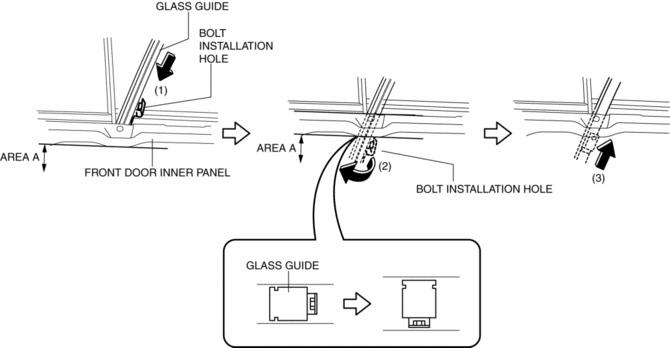
2. When the bolt installation hole of the glass guide reaches area A, rotate the glass guide in the direction of arrow (2) shown in the figure.
3. Move the glass guide in the direction of arrow (3) shown in the figure to adjust the position of the front door inner panel and the bolt installation holes of the glass guide.
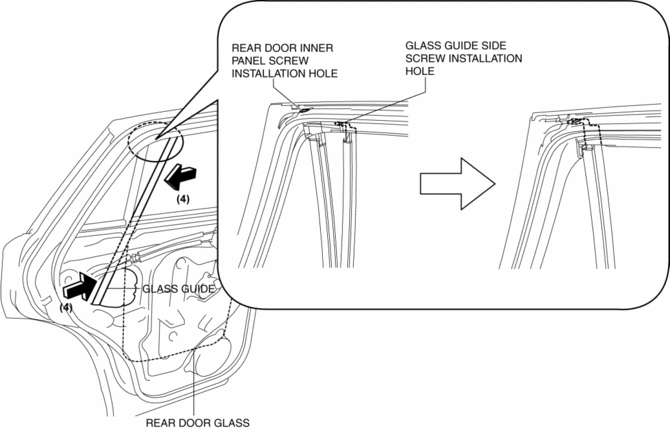
4. Move the glass guide in the direction of arrow (4) shown in the figure and while aligning it to the screw installation hole in the rear door inner panel, set it to the rear door quarter glass and the rear door glass.
 Rear Door Glass Removal/Installation
1. Fully lower the rear door glass.
2. Disconnect the negative battery cable..
3. Remove the following parts:
a. Rear door trim.
b. Rear door quarter glass.
c. Rear door speaker.
d. Rear p ...
 Rear Power Window Regulator Removal/Installation
1. Fully lower the rear door glass.
2. Disconnect the negative battery cable..
3. Remove the following parts:
a. Rear door trim.
b. Rear door quarter glass.
c. Rear door speaker.
d. Rear p ...
Other materials:
Shift Pressure Control (Direct Electric Shift Control) [Fw6 A EL, Fw6 Ax EL]
Outline
The TCM drives shift solenoids No.1, 2, 3, 4, the pressure control solenoid,
and the on/off solenoid based on inputs signals from each switch and sensor,
and performs direct electronic control of the clutch engagement pressure. As
a result, precise hydraulic pressure control ...
Charcoal Canister
Purpose, Function
Absorbs evaporative gas flowing from the fuel tank to prevent release of
the gas into the atmosphere.
Construction
The charcoal canister is installed near the fuel tank.
U.S.A. and CANADA
Except U.S.A. and CANADA
The charcoal canister ...
Outer Mirror Garnish Removal/Installation
1. Disconnect the negative battery cable..
2. Remove the outer mirror glass..
3. Insert a tape-wrapped flathead screwdriver into the upper outer mirror garnish
and remove tab A, B, C, D in the direction of arrow (1).
4. Insert a tape-wrapped flathead screwdriver into the upper outer mirr ...
