Mazda CX-5 Service & Repair Manual: Airflow Mode Actuator Removal/Installation [Full Auto Air Conditioner]
1. Disconnect the negative battery cable..
2. Remove the following parts:
a. Dashboard under cover.
b. Glove compartment.
3. Disconnect the airflow mode actuator connector.
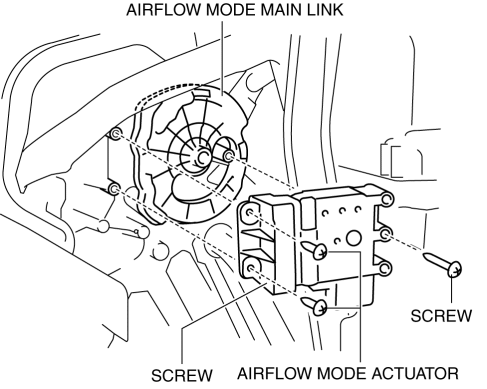
4. Remove the screw.
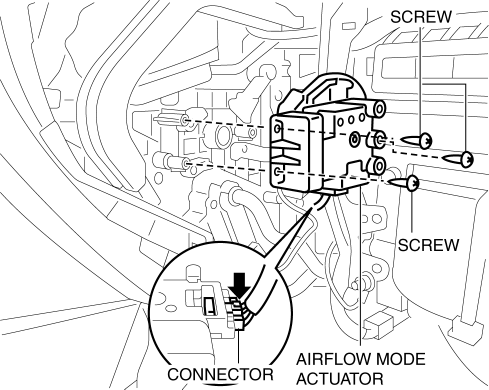
5. Remove the airflow mode actuator.
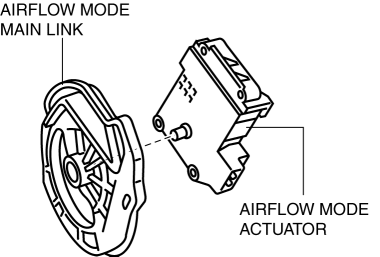
6. Remove the airflow mode main link.
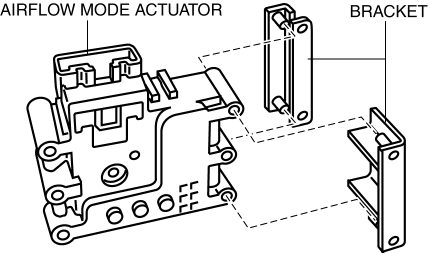
7. Remove the bracket.
8. Install in the reverse order of removal..
Airflow Mode Actuator Installation Note
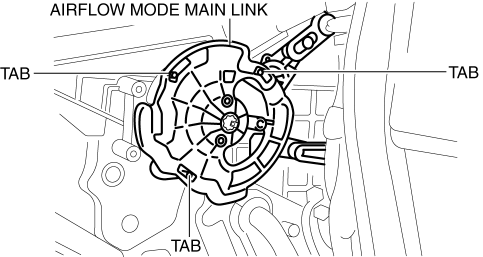
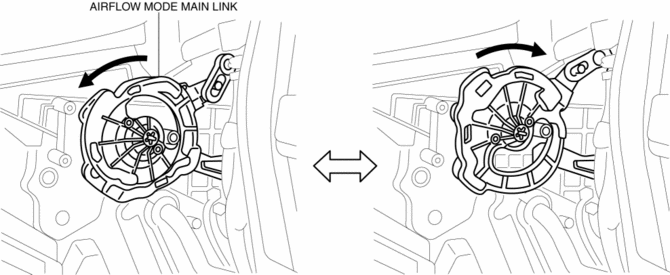
1. Align the airflow mode main link and the airflow mode sub link projection as shown in the figure.
2. When lightly pressing the airflow main link to rotate it in the direction of the arrow, verify that the airflow mode door switches to the position for each mode.
3. Align the airflow mode main link installation hole with the shape of the airflow mode actuator shaft, and install while holding the airflow mode main link.

 Airflow Mode Actuator Inspection [Full Auto Air Conditioner]
CAUTION:
If the lever position exceeds the operation range shown in the figure, the
circuit in the actuator could be damaged. Always perform an actuator operation
inspection with the lev ...
 Airflow Mode Actuator [Full Auto Air Conditioner]
Purpose
The airflow mode actuator moves the mode door in the A/C unit to switch the
air vent.
Function
Door open/close function
The airflow mode actuator drives the motor based ...
Other materials:
Seat Belt Inspection
Belt
1. Verify that the belt is installed properly with no twists or kinks.
2. Verify that there is no damage to the seat belt and no deformation of the
metal fittings.
If there is any malfunction, replace the seat belt.
ELR (Emergency Locking Retractor)
Except rear center seat b ...
Ambient Temperature Sensor [Manual Air Conditioner]
Purpose
The ambient temperature sensor detects the ambient temperature.
Function
The ambient temperature sensor converts the detected temperature to an electric
signal.
Construction
A thermistor-type ambient temperature sensor has been adopted.
The ambient ...
Fuel and Engine Exhaust Precautions
Fuel Requirements
Vehicles with catalytic converters or oxygen sensors must use ONLY UNLEADED FUEL,
which will reduce exhaust emissions and keep spark plug fouling to a minimum.
Your Mazda will perform best with fuel listed in the table.
Fuel with a rating lower than 87 octane (91 RON) could ...
