Mazda CX-5 Service & Repair Manual: Rear Seat Back Frame Removal/Installation
CAUTION:
-
When performing the procedure with a rear seat removed from the vehicle, perform the procedure on a clean cloth so as not to damage or soil the seat.
6:4 Split Type
1. Remove the trunk board..
2. Remove the rear seat back..
3. Remove the headrest.
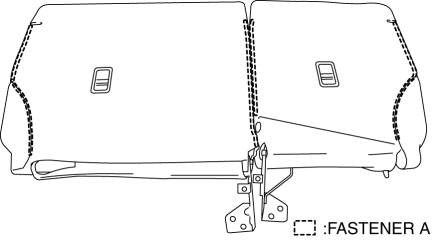
4. Open fasteners A.
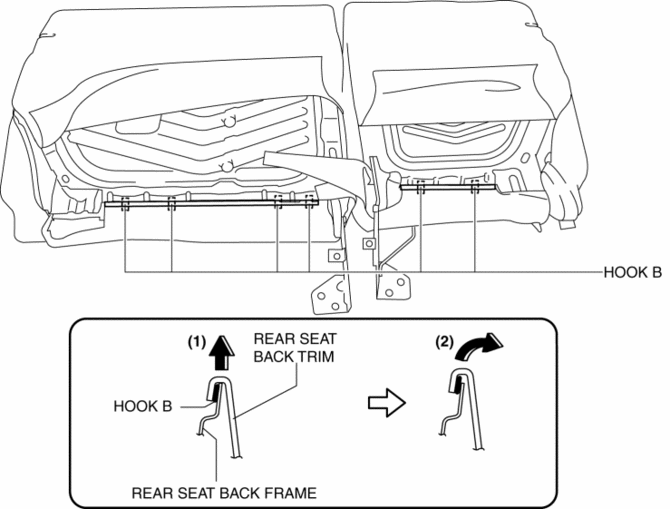
5. Slide hook B in the order of the arrows (1) and (2) shown in the figure, and set the rear seat back frames aside.
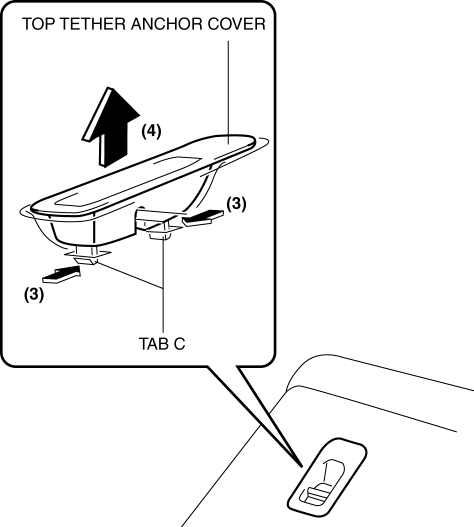
6. Release tabs C in the direction of the arrow (3) shown in the figure and remove the top tether anchor cover in the direction of the arrow (4).
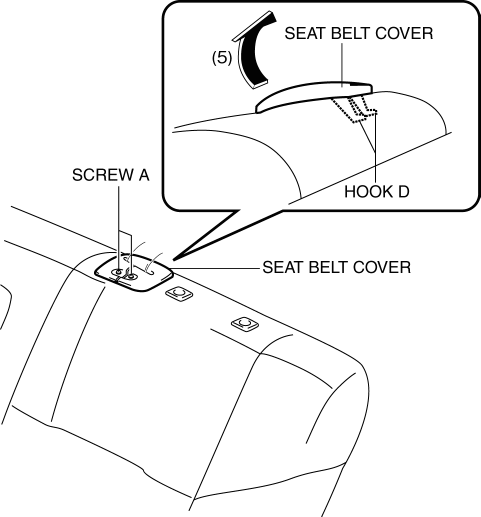
7. Remove screws A, and remove the seat belt cover in the direction of the arrow (5) shown in the figure while setting hooks D aside.
8. Remove screw B.
9. Remove clip E and remove the push knob cover in the direction of the arrow (6) shown in the figure while setting hook F aside.

10. Peel back the rear seat back pad, and pull out the pole guide in the direction of the arrow (8) while releasing the tabs G in the direction of the arrow (7) shown in the figure.
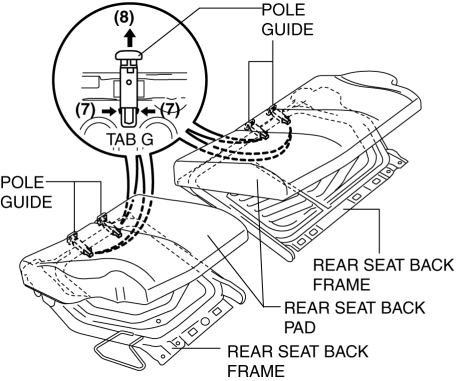
11. Pull the rear seat back frame in the direction of the arrow (9) shown in the figure, and remove it from the rear set back pad.

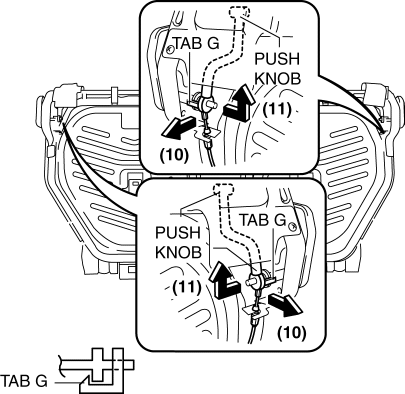
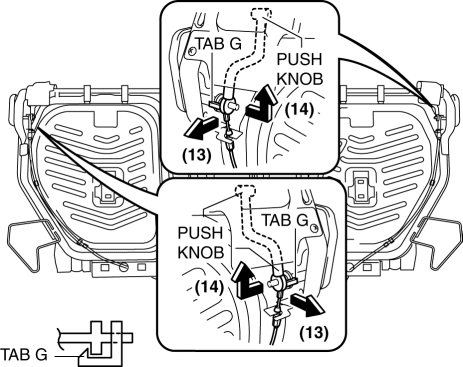
12. Remove tabs H in the direction of the arrow (10) shown in the figure and remove the push knob in the direction of the arrow (11).
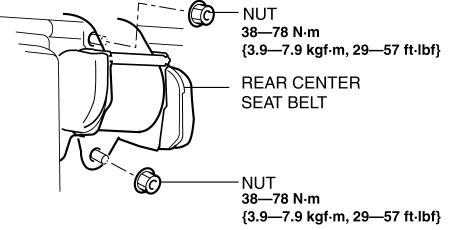
13. Remove nuts, and then remove the rear center seat belt.
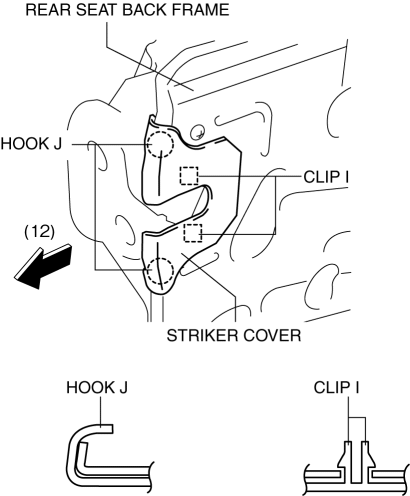
14. Remove the clips I, and then remove the striker cover in the direction of the arrow (12) while setting hooks J aside.
15. Install in the reverse order of removal.
4:2:4 Split Type
1. Remove the rear seat center armrest..
2. Remove the rear seat..
3. Remove the rear seat back..
4. Remove the headrest.
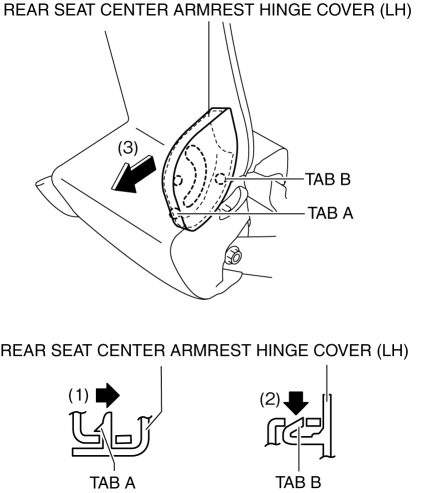
5. After releasing tab A in the direction of the arrow (1) shown in the figure, release tab B in the direction of the arrow (2) shown in the figure, and remove the rear seat center armrest hinge cover (LH) in the direction of the arrow (3).
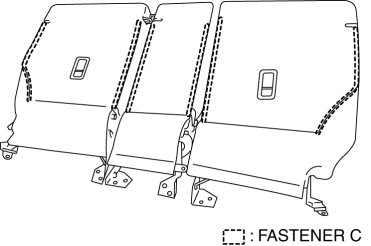
6. Open fasteners C.
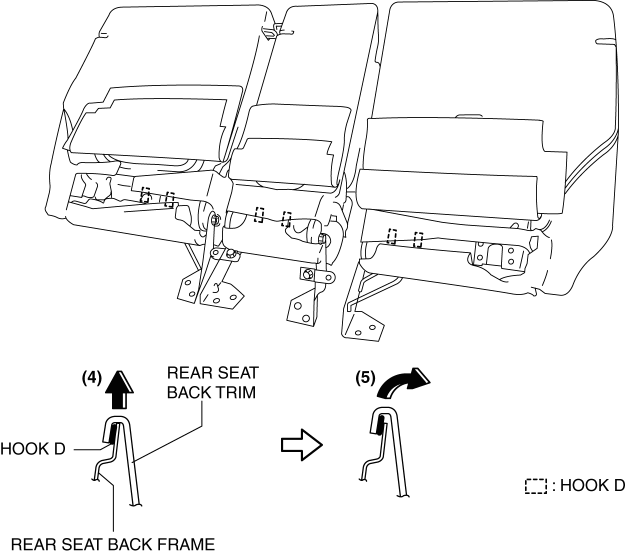
7. Slide hooks D in the order of the arrows (4) and (5) shown in the figure, and set the rear seat back frames aside.
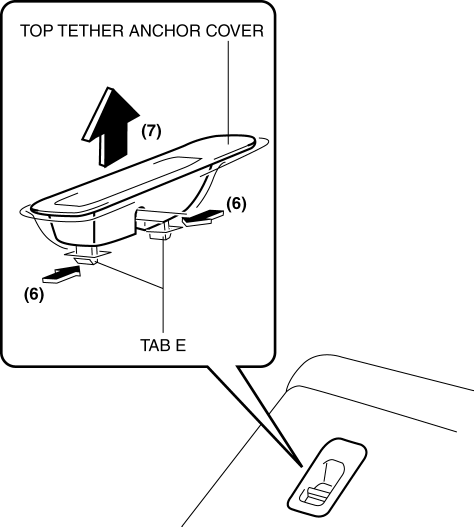
8. Release tabs E in the direction of the arrow (6) shown in the figure and remove the top tether anchor cover in the direction of the arrow (7).
9. Remove screws A, and remove the seat belt cover in the direction of the arrow (8) shown in the figure while setting hooks F aside.

10. Remove screw B.
11. Remove screw B, and clip G and remove the push knob cover in the direction of the arrow (9) shown in the figure while setting hook H aside.
12. Partially peel back the seat back pad, release tabs I in the direction of the arrow (10) shown in the figure and pull out the pole guide in the direction of the arrow (11).
13. Pull the rear seat back frame in the direction of the arrow (12) shown in the figure, and remove it from the rear set back pad.
14. Remove tabs J in the direction of the arrow (13) shown in the figure and remove the push knob in the direction of the arrow (14).
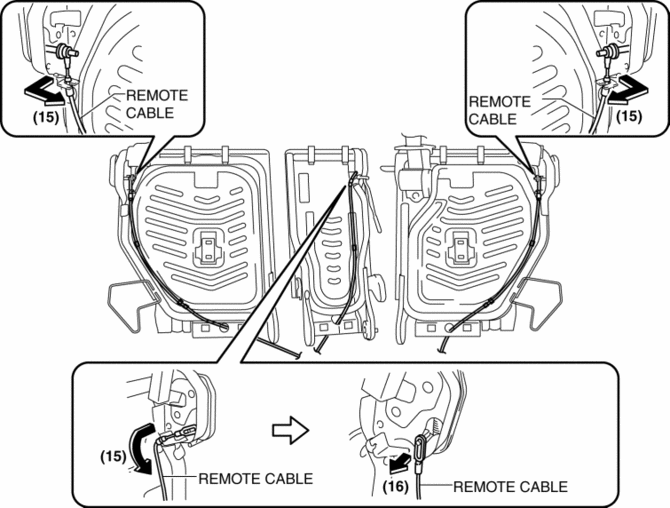
15. Remove clips K.
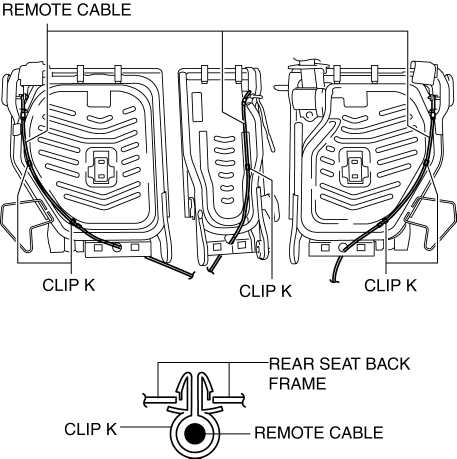
16. Remove the remote cable in the direction of the arrow (15) and (16) shown in the figure.
17. Remove screw C.
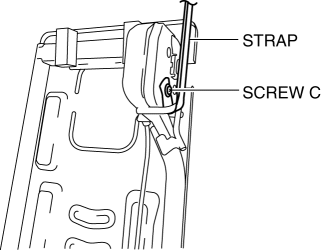
18. Remove the strap.
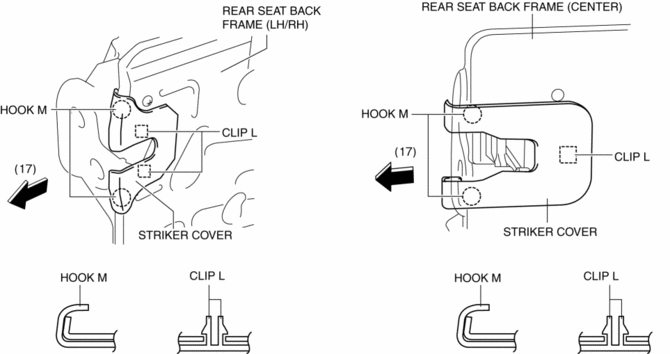
19. Remove the clips L, and then remove the striker cover in the direction of the arrow (17) while setting hooks M aside.
20. Remove nuts, and then remove the rear center seat belt.
21. Install in the reverse order of removal.
 Rear Pillar (Outer) Removal [Panel Replacement]
Symbol Mark
Removal Procedure
1. Rough cut area location indicated by (A) shown in the figure.
2. Drill the 10 locations indicated by (B) shown in the figure.
3. Remove the rear pillar ( ...
 Rear Side Frame Installation [Panel Replacement]
Symbol Mark
Installation Procedure
1. When installing new parts, measure and adjust the body as necessary to conform
with standard dimensions.
2. Drill holes for the plug welding before inst ...
Other materials:
Identification Numbers
Vehicle Information Labels
Vehicle Identification Number
The vehicle identification number legally identifies your vehicle. The number
is on a plate attached to the left top side of the dashboard. This plate can easily
be seen through the windshield.
Motor Vehicle Safety Standard Label
...
Torque Box Removal [Panel Replacement]
Symbol Mark
Removal Procedure
1. Drill the 19 locations indicated by (A) shown in the figure.
NOTE:
When drilling the 19 locations indicated by (A) shown in the figure, do not
drill a hole all the way through or there could be a problem when installing
the new part.
2 ...
Sunvisor Removal/Installation
1. Disconnect the negative battery cable. (with vanity mirror illumination).
2. Remove the screw A.
3. Rotate the sunvisor in the direction of the arrow.
4. Unhook and remove the sunvisor.
5. Disconnect the vanity mirror illumination connector. (with vanity mirror illumination)
6. Pr ...
