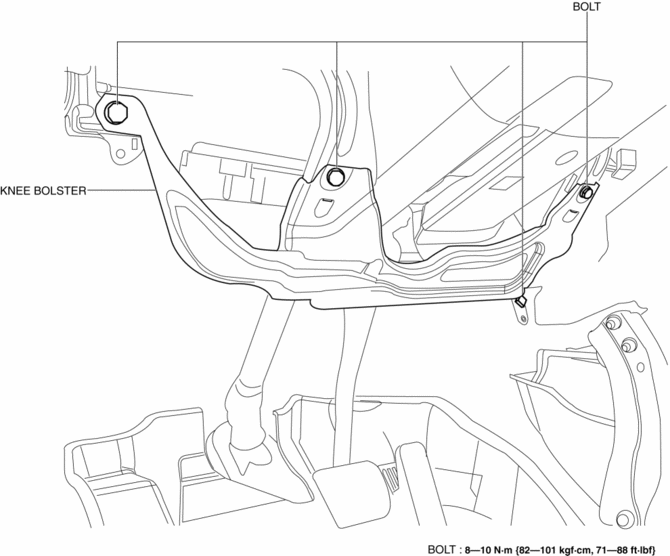
Mazda CX-5 Service & Repair Manual: Knee Bolster Removal/Installation
1. Disconnect the negative battery cable..
2. Remove the following parts:
a. Driver-side front scuff plate.
b. Driver-side front side trim.
c. Switch panel.
d. Decoration panel.
e. Shift lever knob (MTX).
f. Front console box.
g. Shift panel.
h. Upper panel.
i. Rear console.
j. Side wall.
k. Front console.
l. Hood release lever.
m. Driver-side lower panel.
3. Remove bolts.
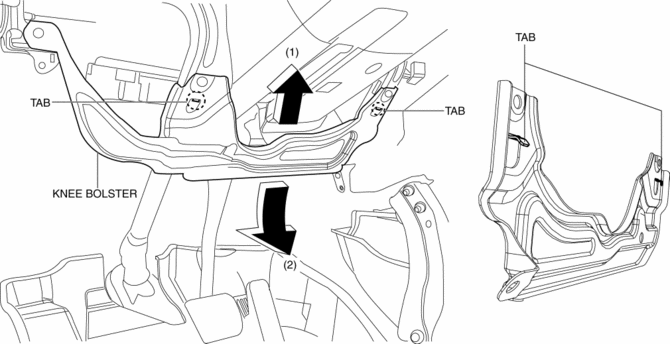
4. Pull the knee bolster in the direction of the arrow in the order of (1), (2) while detaching tabs.
5. Install in the reverse order of removal.
 Glove Compartment Removal/Installation
1. Push the glove compartment in the direction of the arrow (1) and remove hooks
A.
2. Pull the stay damper in the direction of the arrow (2) shown in the figure
and remove the hook B.
CAU ...
 Rear Console Disassembly/Assembly
1. Disassemble in the order indicated in the table.
1
Screw A
2
Rear console bracket
3
Screw B
4
...
Other materials:
Light Bulbs
WARNING
Do not replace the xenon fusion bulbs yourself:
Replacing the xenon fusion bulbs yourself is dangerous. Because the xenon fusion
bulbs require high voltage, you could receive an electric shock if the bulbs are
handled incorrectly. Consult an Authorized Mazda Dealer when the replaceme ...
Floor Mat
WARNING
Make sure the floor mats are hooked on the retention pins to prevent them from
bunching up under the foot pedals:
Using a floor mat that is not secured is dangerous as it will interfere with
the accelerator and brake pedal operation, which could result in an accident.
Do not install t ...
Keyless Beeper Removal/Installation
1. Disconnect the negative battery cable..
2. Remove the cowl grille..
3. Disconnect the connector.
4. Pull the keyless buzzer in the direction of the arrow (2) shown in the figure
while pressing the keyless buzzer tab in the direction of the arrow (1) shown in
the figure, detach the k ...
